Abstract
The subject of the research that has been conducted in this paper was to analyze precipitation-hardened martensitic stainless steel 17-4 PH after flow forming with four different strains and subsequent standard heat treatment. Four cylinders were obtained with a 16, 30, 48 and 68% reduction in thickness, respectively. The samples were analyzed in terms of their mechanical properties and microstructural changes before and after the heat treatment. The results showed that a higher strain resulted in an overall higher strength (up to 1200 MPa UTS) and refinement of the structure, although at a cost of the elongation. High deformation influenced the precipitation process, and the ratio of the grain boundaries significantly increased. Nonetheless, comparing the obtained results with other similar research, it seems that the formation of nano-precipitates of Cu is the key-strengthening mechanism. Strain hardening contributes to an increase in the strength of the steel, although the effect decreases after heat treatment. The relatively small values of residual stress in the steel, especially after the heat treatment, confirmed these claims. Overall, flow forming allowed high deformations of the 17-4 PH steel to be obtained although it did not significantly change the mechanical properties of the material due to the dominant precipitation hardening mechanism.
Introduction
The main parameters of the flow-forming process are thickness reductions, roller speed (mm/min) and mandrel rotations (rev/min). Thickness reduction is proportional to the deformation induced in the material. This value is primarily controlled by the gap between the roller and the mandrel, although other variables like the stiffness of the tooling and the process parameters also have a significant impact. The ratio of the feed rate of the roller to the rotational speed is also called the feed ratio and, according to many research papers (Ref 1, 2), it is the most important parameter which determines the overall forces of the process. Generally, a higher rotating speed decreases the tendency of defects to develop as well as the surface quality of the obtained product, although lower accuracy can be achieved with increased process time (Ref 3). On the other hand, too low a rotation speed will lead to cracking and higher stress concentrations but better dimensional accuracy. Other important parameters are nose radius, roller diameter and attack angle (Ref 4).
The tested material was 17-4 PH stainless steel obtained according to AMS 5604 with a chemical composition of ca. 16.25 Cr 4.0, 4.0 Ni, 4.0 Cu, 0.07C and 0.45 Nb/Ta. It is a martensitic steel, hardened with additional Cu nano-precipitates to further strengthen the material. Thanks to its good corrosion resistance, excellent mechanical properties and relatively low price; it is becoming more commonly used in demanding applications. However, due to the complex microstructure, it is very susceptible to heat treatment which is also deformation dependent which strongly influences the physical properties of the material. According to Hsiao et al. (Ref 5), deformation may decrease the size of the precipitation in martensitic steels due to a higher concentration of nucleation sites. The precipitation begins with coherent (bcc) Cu-rich precipitates, which have been reported to transform to non-coherent fcc-Cu-rich particles after extended aging at 400 °C (Ref 6). Furthermore, after a prolonged time at 350 °C, a brittle mixture of α + α′ can be observed in the microstructure (Ref 7). Due to this transformation, the maximum working temperature of 17-4 PH steel is just 300 °C.
The microstructure of 17-4 PH stainless steel is a mix of various phases, primarily martensite and, depending on the annealing conditions, retained austenite and δ ferrite with additional small precipitates of Cr and Nb carbides and nano-Cu precipitates (Ref 8). Due to the complex chemical composition of the steel, complex phase transformations may occur due to thermo-mechanical reactions in the material. According to Lo et al. (Ref 9), there are over 13 phases encountered in stainless steels, which may also occur in 17-4 PH depending on the process conditions and temperature. Furthermore, the mechanical properties of the annealing conditions may significantly differ, which can strongly influence the precipitation process. Yoo et al. (Ref 8) reported that by the appropriate selection of parameters, it was possible to achieve a tensile strength of 1379 MPa and a yield strength (YS) of 1275 MPa, but with a significant decrease in strain until it breaks, and impact strength. Nonetheless, it is possible to influence the process even further by introducing additional preformation which will change the nucleation of the precipitates. According to the current authors’ reasoning, this should enhance the mechanical properties of the material.
The main aim of the results of this research was to determine the formability of 17-4 PH steel in the flow-forming method and furthermore the microstructure changes that may be a result of high deformation and heat treatment. However, as it turned out, the mechanical properties of the material were only slightly altered in comparison to the initial state.
Experimental Work
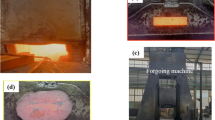
The 17-4 PH stainless steel that was used in the experiment was obtained according to AMS 5604. Sheets of 1.9-mm-thick metal were deep drawn to the geometry shown in Fig. 1(a). To homogenize the metal, the standard heat treatment was used. The metal-forming process was conducted using a prototype SFC 800 V500 machine, and different thickness reductions were used to determine the formability of the material. The gap between the roller and the mandrel was first kept constant and then changed in the individual technological tests to obtain thickness reductions of different amounts. The deformation was performed in one movement of the tool.
Tensile tests were carried out using mini-samples of the steel with gauge lengths of 10 mm. The experiment was conducted using a Zwick/Roell 005 machine with an initial strain rate of 10−3 1/s. The tests were carried out at room temperature, and three samples were used for each treatment. Optical non-contact displacement measurement by the digital image correlation technique was used for precise elongation measurement, according to the procedures described by Molak et al. (Ref 10). The cylinders were then tested in the radial direction, and the dimensions of the mini-samples used in the experiment are shown in Fig. 1(b). The samples that were tested were extracted from the middle part of the cylinders. Three hardness tests for each condition were carried out in the experiment, and the spread of the results was relatively small. The highest differences were observed in case of the yield strength which was a result of the high sensitivity of the parameter (stress at 0.2% plastic strain). The Vickers hardness measurements were performed in air at room temperature under a constant loading condition, using a load of 9.8 N for a holding time of 15 s. The hardness was measured at a minimum of four points on each specimen.
For the optical microscope (OM), the material specimens were etched using Vilella’s etchant (1 g picric acid, 5 ml HCl and 100 ml ethanol). The residual stresses were measured using a Bruker D8 Discover x-ray diffractometer with a point beam collimated to approximately 1 mm Cr Kα1 (2.29 Å) radiation. Measurements were provided by the sin2 Ψ method which is considered to be a nondestructive method among the many stress determination methods. X-ray diffraction residual stress measurement uses the distance between crystallographic planes, d, as a strain gauge. The deformations cause changes in the d spacing of the lattice planes from their stress-free value, to a new value that corresponds to the magnitude of the residual stress. Due to Poisson’s ratio effect, if a tensile stress is applied to a material, the lattice spacing will increase for planes perpendicular to the stress direction and decrease for planes parallel to the stress direction. The diffraction angle (2Θ) is measured experimentally and then plotted versus sin2 Ψ. (Ψ is the specimen tilt angle.)
Additional transmission electron microscopy (TEM) characterization was also carried out. The samples (100-µm-thick disks with a diameter of 3 mm) were cut from heat-treated sheets of Inconel 17-4 PH using wire electro-discharge machining (WEDM). The foils were then electropolished using A2 electrolyte, provided by Struers, in a similar manner. The observations were done using a STEM 5500 Hitachi microscope.
Sample Preparation
The aim of this research was to induce high strain in the material using the flow-forming method and analyze the changes that occurred in it. Additional heat treatment was conducted to investigate the impact of the deformation on the precipitation processes. Overall, the experiment demonstrated good formability of 17-4 PH steel. Large strains (over 67% reduction in thickness) were induced in the material in one technological process without additional intermediate annealing. After the flow-forming process, cylinders were obtained using the same process parameters. Four different thickness reductions were induced in the material, as seen in Table 1. The process assumed that the thickness value was equal to the offset value between the mandrel and the roller. As it turned out, the difference was significantly higher and was a result of the spring-back effect and the clearances of the machine. Nonetheless, the visual quality of the surface was even better than that after extrusion of the prefabricate. The next step involved the heat treatment of the material in standard aging conditions. No cracks or any defects were observed in the elements obtained. The metal-formed cylinders are shown in Fig. 2.
Results and Discussion
Mechanical Tests Results
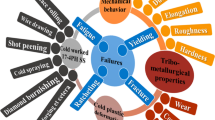
The tests that were conducted showed that with the increase in the thickness reduction, the hardness and the strength of the material increased, and the ductility decreased (Table 1 and 2) (Fig. 3). Similar results have been observed in many other metallic materials due to strain hardening. However, the sensitivity of this process was relatively low in comparison with similar materials subjected to high deformation, for example multiple rolling (Ref 11). This is most probably due to a large proportion of precipitation hardening which is the dominant hardening mechanism. The difference between the UTS (ultimate tensile strength) before and after the largest thickness reduction was about 300 MPa, and the elongation before breaking was three times smaller (Fig. 3). In terms of hardness, work hardening increased the value from 350 to 400 HV which was proportional to the registered mechanical properties.
The heat treatment increased the plasticity of the samples, although they were still 20% higher than the initial state (Fig. 4). On the other hand, the annealing process caused a decrease in the UTS; however, the YS remained the same. After the greatest thickness reduction, the sample (C4) had a UTS of more than 1000 MPa and an elongation of 17% at the break point which was a rather small change in the mechanical properties in comparison to the initial state.
The changes in the mechanical properties were gradual despite severe plastic deformation of the material. In terms of the evolution of the microstructure, elongated deformed grains and precipitates were observed using TEM (Transmission Electron Microscopy) and optical microscopy. Nonetheless, the changes were not particularly significant, despite the large thickness reduction, after comparing the changes to other similar materials after the same metal-forming process (Ref 12,13,14). The accompanying mechanical properties displayed similar relatively small changes. This may be explained by fine martensitic laths and precipitate strengthening which are the dominant mechanisms responsible for high material strength, even in the initial state. Strain hardening was limited in the 17-4 PH due to the severe distortion of the microstructure caused by a great share of forest dislocations, even in the initial state.
SEM Fractography
Complementary tests were done for the samples after tensile tests to analyze the fracture surface of the samples. The material in the initial stage displayed a typical ductile fracture with micro-dimples with a developed surface (Fig. 5a). Flow forming decreased significantly the plasticity of the material. This is reflected in the fractography of the sample after the highest cross-sectional reduction (Fig. 5b). The surface was almost flat and had additional ledges and terraces which suggest partially brittle fracture. On the other hand, the heat treatment caused strength decrease and increase in plasticity which is reflected in the SEM micrograph (Fig. 5c) which in a greater extent reassemble the initial state of the material.
Optical Microscopy
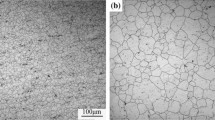
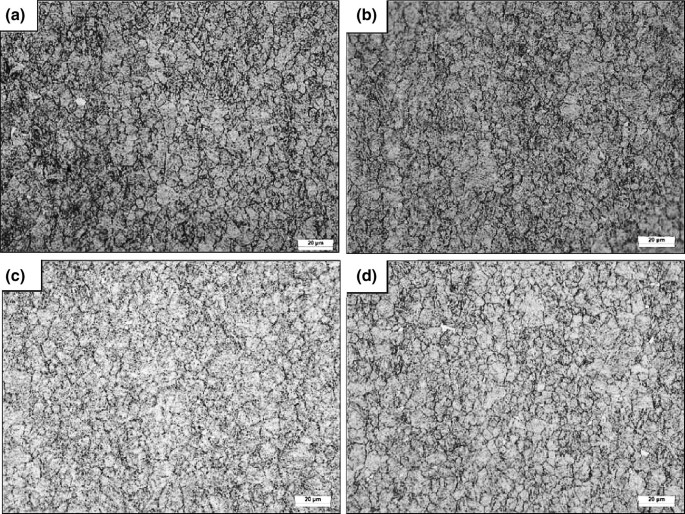
In order to analyze the material before and after the heat treatment, microstructure tests were done using optical microscopy. Blurred grain boundaries were visible and, with the increase of the strain, an increase in the grain refinement was observed (Fig. 6). Furthermore, in the cases of samples c and d, shear bands were observed in the microstructure in the radial direction. The heat treatment caused uniform grain growth and recrystallization throughout the material, which is visible in Fig. 7 in the form of equiaxed grains. In comparison with the initial state, it caused an increase in the grain size and the disappearance of the morphological texture was due to metal forming. When comparing the grain sizes in the initial state and after heat treatment, a slight refinement was observed with gradual thickness reduction.
TEM Microscopy
The samples were prepared for TEM analysis after a 30 and 68% thickness reduction before and after heat treatment (Fig. 10 and 11). Additionally, for comparison, the initial state of the material was also studied (Fig. 9). Martensitic laths were seen in all the tested materials, although they had been distorted by the flow-forming process. What is worth noting is that the dislocations were anchored on Cu precipitations, which can be seen in Fig. 8. The very dense precipitates were interconnected by forest dislocations. The metal-forming process had influenced the orientation and shape of the individual grains. Additionally, various precipitates were abundant in the material, especially the nano-Cu and niobium carbides that were grouped along shear bands, which was a result of the metal-forming process (Fig. 9) (Table 3). The dislocation meant the free paths were limited by a dense precipitate structure. Nonetheless, both microstructure elements substantially hampered dislocation movement, which reduced the effect of strain hardening. This was even more evident when analyzing the results of Yoo (Ref 8), who achieved a UTS of 1379 MPa by using heat treatment on the material at 900° F (482 °C).
Comparing individual microstructures, it could be observed that the induced strain only slightly influenced the microstructure even at the largest deformation causing distortions in the grain shapes. The heat treatment (Fig. 10b and 11b) caused a significant increase in the density of the precipitates, especially when compared to the cold-formed samples (Fig. 10a and 11a). The reductions in thickness (induced strain) did not influence the precipitation process, and the C2-HT and C4-HT samples were comparable and did not have any noticeable differences. Overall, the samples had similar microstructures, which were independent of the thickness reductions. What is worth noting is that the additional stress due to the plastic deformation did not influence the precipitation process, which was good from the viewpoint of future applications. The analyzed residual stress was relatively low, and the microstructure was only slightly distorted which indicates susceptibility to plastic deformation.
XRD Residual Stress Analysis
Complementary tests were carried out using XRD analysis. The main aim was to analyze the residual stress, depending on the thickness reduction and applied heat treatment. The obtained results (as seen in Table 4) showed an increase in the residual stress with the thickness reduction. Furthermore, the difference between the values before and after the heat treatment increased with the reduction in thickness. The main stress on the surface was compressive, with a maximum value of 255 MPa (C4 sample). The heat treatment reduced this value to 88 MPa, which was slightly lower than in the lowest thickness reduction (C4-HT). In case of the lowest deformation, the difference between the cold-formed sample and the heat-treated sample was within measurement error limits.
From the viewpoint of the overall cold metal-forming process, the currently used method (flow forming) was able to obtain a relative high thickness reduction (up to 67%) in one technological process. What is also worth noting is that the changes in the mechanical properties were rather small, considering the induced deformation. As it turned out, the reason for this was the very dense precipitation concentration and arrangement of the dislocations which significantly decreased the mean free path of their movement. The plastic resistance caused by the Cu precipitation was very high, limiting the grain refining and the increase in the internal stresses caused by strain hardening. It is worth noting that, according to the literature, the formability of the 17-4 PH steel was limited to only mild operations. However, it can be greatly improved by hot-forming methods (Ref 15). Flow forming also has good formability at room temperature, which is beneficial in terms of further processing of the 17-4 PH steel.
Conclusion
-
Cold flow forming allowed for a maximum of thickness reduction of up to 67% to be obtained without any cracks and with a good surface finish.
-
The main strengthening mechanism was precipitation hardening, and strain hardening was visible in the microstructure in the form of dense forest dislocations. This meant that the dislocation free path length was short, which significantly increased the plastic resistance and hampered grain refining. As a result, the residual stress was relatively low about − 250 MPa.
-
Strain hardening increased the UTS of the steel by 400 MPa (1210 Ma) and decreased the elongation at break up by 15% in comparison to the initial state.
References
C.C. Wong, T.A. Dean, and J. Lin, A Review of Spinning, Shear Forming and Flow Forming Processes, Int. J. Mach. Tools Manuf., 2003, 43(14), p 1419–1435
M.S. Mohebbi and A. Akbarzadeh, Experimental Study and FEM Analysis of Redundant Strains in Flow Forming of Tubes, J. Mater. Process. Technol., 2010, 210(2), p 389–395
O. Music, J.M. Allwood, and K. Kawai, A Review of the Mechanics of Metal Spinning, J. Mater. Process. Technol., 2010, 210(1), p 3–23
M. Jahazi and G. Ebrahimi, Influence of Flow-Forming Parameters and Microstructure on the Quality of a D6ac Steel, J. Mater. Process. Technol., 2000, 103(3), p 362–366
Z.-W. Hsiao, D. Chen, J.-C. Kuo, and D.-Y. Lin, Effect of Prior Deformation on Microstructural Development and Laves Phase Precipitation in High-Chromium Stainless Steel, J. Microsc., 2017, 266(1), p 35–47
H. Mirzadeh and A. Najafizadeh, Aging Kinetics of 17-4 PH Stainless Steel, Mater. Chem. Phys., 2009, 116(1), p 119–124
J. Wang, H. Zou, C. Li, S. Yu Qiu, and B. Luo Shen, The Effect of Microstructural Evolution on Hardening Behavior of Type 17-4 PH Stainless Steel in Long-Term Aging at 350 C, Mater. Charact., 2006, 57(4–5), p 274–280
W. Do Yoo, J.H. Lee, K.T. Youn, and Y.M. Rhyim, Study on the Microstructure and Mechanical Properties of 17-4 PH Stainless Steel Depending on Heat Treatment and Aging Time, Solid State Phenom., 2006, 118, p 15–20
K.H. Lo, C.H. Shek, and J.K.L. Lai, Recent Developments in Stainless Steels, Mater. Sci. Eng. R Rep., 2009, 65, p 39–104
R.M. Molak et al., Use of Micro Tensile Test Samples in Determining the Remnant Life of Pressure Vessel Steels, Appl. Mech. Mater., 2007, 7–8, p 187–194
M. Hadji and R. Badji, Microstructure and Mechanical Properties of Austenitic Stainless Steels After Cold Rolling, J. Mater. Eng. Perform., 2002, 11(April), p 145–151
J. Hamada and N. Ono, Effect of Microstructure before Cold Rolling on Texture and Formability of Duplex Stainless Steel Sheet, Mater. Trans., 2010, 51(4), p 635–643
R.Z. Valiev, Superior Strength in Ultrafine-Grained Materials Produced by SPD Processing, Mater. Trans., 2014, 55(7), p 13–18
A. Belyakov, Y. Kimura, and K. Tsuzaki, Microstructure Evolution in Dual-Phase Stainless Steel During Severe Deformation, Acta Mater., 2006, 54(9), p 2521–2532
http://www.aksteel.com. 17-4 PH stainless steel. Product Data Bulleting. 2013. http://www.aksteel.com/pdf/markets_products/stainless/precipitation/17-4_ph_data_bulletin.pdf. Accessed 13 Dec 2016
Acknowledgment
The financial support of the National Center for Research and Development in the Program INNOLOT CASELOT INNOLOT/I/9/NCBR/2013 is gratefully acknowledged.
Author information
Authors and Affiliations
Corresponding author
Rights and permissions
Open Access This article is distributed under the terms of the Creative Commons Attribution 4.0 International License (http://creativecommons.org/licenses/by/4.0/), which permits unrestricted use, distribution, and reproduction in any medium, provided you give appropriate credit to the original author(s) and the source, provide a link to the Creative Commons license, and indicate if changes were made.
About this article
Cite this article
Maj, P., Adamczyk-Cieslak, B., Lewczuk, M. et al. Formability, Microstructure and Mechanical Properties of Flow-Formed 17-4 PH Stainless Steel. J. of Materi Eng and Perform 27, 6435–6442 (2018). https://doi.org/10.1007/s11665-018-3724-9
Received:
Revised:
Published:
Issue Date:
DOI: https://doi.org/10.1007/s11665-018-3724-9


